Module 7: TELLING A STORY Part 2 – Mini-Doc (Production and Post)

Class Reflection:

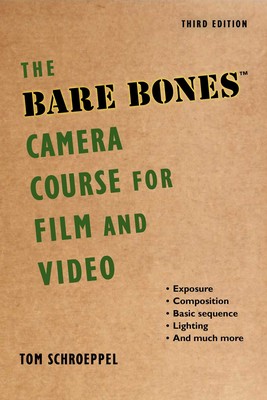
When I first started this course, I had already read the “Bare Bones Camera Course for Film and Video” in my undergraduate course and had a degree in both journalism and film. So I felt I had already learned a lot of the content in this course. That being said it’s always good to re-learned things and try different techniques over and over again to better yourself. So by the time I finished the course, I had re-learned a lot fo things and remembered a lot of things that I had since forgotten from my first few years of film school.

On the other hand the most important thing I learned from this course was the first few modules on audio. I tend to still overlook my audio in projects, because for so long I was hyper focused on the visuals. But during the podcast, the How-To, and the montage modules I learned the importance of balancing sound effects and dialogue. And to not make the sound effects so loud so that they feel more like they are buried in the ambient environment of the project and not actually added in post. I also wish I could continue to learn even more about this topic as sound engineering and sound mixing seem very interesting to me and they way that many films and professional podcasts are able to seamlessly blend a soundtrack, sound effects and dialogue/narration is incredible.

The hardest part about this course was finding the time to make the projects and being able to make them safely during all of these COVID-19 regulations. I took this graduate degree back at home while having a full time job and taking another course with this so some weeks I physically had no idea when I was going to be able to schedule in shooting time for these projects or editing time. Other times I would have new and different ideas, but wouldn’t be able to safely complete them and didn’t have other film friends around to help out like I used to have back at school in Connecticut.

Overall this class was fun to go back and relearn many film standards as well as find new techniques in old lessons as I graduate now I’m definitely going to take what I learned in class and apply to all of the projects I do for work and in my personal life.

My Inspiration:

The use of an L-cut in this dream sequence is actually a very popular use of L-cuts when it comes to transitioning into dream sequences. In this scene the main character begins to talk about the dream he had and as he continues to talk about the dream it cuts to the visual of the dream before adding in any of the dreams sound. This techniques is used in many other movies as well.

The use of J-cut in this scene Matthew McConaughey’s character’s iconic humming and chest bumping is heard in the scene before it cuts to the dinner scene. This tactic is used I feel even more common in movies then an L-cut. Other movies that use this cut are the Hurt Locker when they after cutting over the helicopter scene, when the helicopter propellers are heard before they actually cut over to the helicopters.

My Mini Documentary:

After last week’s pre-production. I quickly planned a time to interview Dan and then got clearance to film a couple of his lesson in the first half of the week. I also knew that since I didn’t have a ton of time to film this I got old photos from his life and pulled out some studio footage that I had filmed of Dan from a couple of months ago.

After completing the interview with Dan I realized I wasn’t going to be needing to do much narration. He talked very passionately and for a very long time about his life in music and how much he loves teaching. So I really just used my narration to bridge a couple of the different sections of the interview together. And then tried to layer as much b-roll and personal photos I could over the parts of the interview that the footage matched up with.

This met that the b-roll of him teaching went over the part of the interview where he talked about teaching and when he talks about the guitar and upright base I have footage and photos of him playing the guitar and upright base.

Overall it was a difficult project to plan and execute in a short period of time, but once I had all of the pieces it was a fairly simple piece to edit since my whole job was to just make sure the finished product told Dan’s musical journey.

Nightmares From Set: Vol. 6 Fox’s 9-1-1, The Impossible & Titanic

In the past couple of weeks I’ve talked about complex sets and production weeks, but in my opinion the hardest practical effect to achieve is massive natural water disasters, like a tsunami, a flood or a boat sinking. Many famous films have water disasters like the film 2012 and Pirates of the Caribbean, but a lot of the time these effects are done using CGI, but a couple films and TV shows take the leap and use real water tanks and wave machines to get the full effect and it shows.

Titanic:

Obviously, everyone knows that Titanic takes the cake in extreme water spectacles. James Cameron wanted to make you feel like you were on that boat.

One of the most harrowing scenes to film practically in the Titanic was the after crashing down the stairwell. They had to get the shot exactly right with the first take because the staircase was rigged to fall apart a specific way and after that take if the shot didn’t work they would have had to halt production and fully re-built a completely destroyed set.

On top of that the boat they built and sunk in a massive water pool in Mexico cost over $150 million dollars and the movie itself cost over $200 million, making the most expensive movie ever made at that time. On top of everything else because everyone had to be in the water for so long, people were freezing to death and getting ill, no one could pee so people started peeing in the water, it was overall just bad. “When the production moved to Mexico, and literally thousands of extras and stuntmen re-enacted the sinking of the Titanic on a replica built to 90 per cent scale, Cameron imposed a work regime that left everyone else reeling. After spending hours each day standing waist-deep in chilly, dirty Pacific sea water, many cast members came down with colds, flu or kidney infections.” (Gumbel).

The Impossible:

Another movie that went all the way on getting realistic water effects and shots with the actors in the water disasters them selves was the 2010 film “The Impossible” which was another true story about the Tsunami that hit Thailand. In an interview done with director J.A. Bayona he tells The New York Times, “One of the early decisions was not to use C.G.I. water, because it was very expensive, but also because it didn’t feel real,” Mr. Bayona said during an interview at the Toronto International Film Festival in September. “So we decided to go with real water, which was kind of a crazy thing.” (Murphy).

The filmed used 3 different types of water rigs to get different needed scenes. The wave was a massive pool that had a maxi-miniture, which is just a larger scale miniature of the resort buildings that get destroyed by the wave. “The special-effects team worked with Edinburgh Designs, a company specializing in simulating waves for surfing schools and pools at water parks. “They work on creating the perfect wave, but what we wanted to create was very nasty, wide and imperfect, so it was something completely different for them,” he said (Murphy).

For the current that pulls the mom, (Namoi Watts) and the eldest son (Tom Holland) they used what they called a massive flowerpot so that the water would be controlled but large enough to make them feel like they were actually being yanked around. For this footage the actors were shot in a surge of water created in an outdoor tank in Alicante, on the southeast coast of Spain… “We put them in what looks like a giant flowerpot, so we could move them in the water safely,” Mr. Bayona said. Powerful pumps moved 3,000 liters per second to create the pull” (Murphy). This was tricky and put everyone a little on edge because the person who was on screen the most taking the hit from the water was Holland, who at the time was only about 13 or 14 and the crew were extra careful to make sure he didn’t get hurt or actually start to drown.

Fox’s 9-1-1

The final project that used complicated practical water effects was Fox’s hit television 9-1-1. In their season 3 opener a tsunami hits the coast of California and the main characters are stuck trying to help everyone at the Santa Monica boardwalk and other places around Los Angeles.

The TV sho creators and producers chose to take the whole cast and crew and fly down to Mexico to film in the same monster pool that Titanic was filmed in. They even built half of the Santa Monica Ferris Wheel and had it sticking out of the water like it had been washed away. In a Fox featurette on the episode, Bradley Buecker, the director and one of the show’s executive producers, said “We built a replica of the Santa Monica Pier and really it’s one of the most insane things I’ve ever done.”

Using that pool they fully flooded fake streets had full fire trucks submerged in water and put the whole cast out on real rescue boats with cameras attached to them as they filmed them rescuing extras from the water.

For a network show that doesn’t have as big a budget or as long of a shooting schedule as a major motion picture the episode that the tsunami took place in could have been pulled form a major block-buster film they looked so good.

All three films achieve incredible feats, but the complexity and the months of preplanning paid off because these movies and tv show really pull you in and make you feel the panic the characters have as their lives flash before their eyes because they’re drowning in real water.

Module 6: Telling A Story – Mini Doc Pre-Production

Readings:

This week in the Tom Schroeppel’s textbook, “The Bare Bones Camera Course for Film and Video” I read the two chapters on Lighting and how to physically apply everything you’ve learned, by just “Doing It”.

In chapter 7 all about lighting, Schroeppel talks about the importance of light and how there are many different ways to light a scene. But the most basic three types are exterior, interior and then a basic set up or another version is 3-point-lighting.

Exterior lighting is just utilizing the most powerful light in the world, the sun. Of course the sun can be a difficult light to manage since it’s always moving. So Schroeppel’s tip is to have the subject facing the sun so it’s lit evenly on all sides and then use reflectors or bounce cards to fill in any shadows.

Interior lighting is using specific studio lights indoors to manufacture any type of feeling you want. The most common lights used are focusing quartz, broads and soft lights. A focusing quartz is like a spotlight that you would see on stage for a theatrical production. They are very strong and don’t light a large area. A broad is just a large room light. It just coats the whole area in one consistent blanket of light. And finally a soft-light or a soft-box light. Is a soft bounce light used to fill in shadows or to softly light a room by bouncing it off walls and ceilings.

The final lighting set up, the basic set up consists of a key-light, which usually just front lights the subject. A fill light, which fills in any of the shadows the key light may create and a back light which separates the subject from the background. Then if the three point lighting isn’t enough you can add a fourth light which is the background light which is bounced off the wall to light the room around the subject.

In chapter 9 which all about actually taking all the information about pre-production, production and post and applying to an actual project, Schroeppel talks about understanding what you want to have achieved by the end of the project and knowing where you want to film it, who is should be filmed. Knowing exactly where the camera will go for each shot by creating storyboards and scripts ahead of time.

It’s also important to know who you want your actors to react and/or speak and you need to communicate all of your wants and needs simply to everyone else you’re working with so that they have the same end goal as you in mind when working on the project.

Good and Bad Examples of Storytelling:

The traveling news series “On the Road with Steve Hartman” is hands down one of my favorite to watch. Hartman always finds the most heartwarming stories and tells them in a way that makes you actually care for these people you’ve never met. His sound bites are always super compelling. You can always clearly understand what everyone is saying and the nat sound used in his b-roll pops really well. Plus the visuals he gets always match up with what he is saying and he makes a pint to do a fun and interesting stand – up in each package.

This is hands down one of my favorite documentaries I’ve ever watched. It takes real people and brings you into their lives for a little while ot show you that hunger isn’t just a homeless person’s problem and that we need to stop treating it like it is. The visuals alone are breathe taking at times because you just don’t expect to see these families struggling with something like hunger. The whole documentary uses every storytelling technique to change the viewers perception of hunger and starvation and how there is a difference and more people then you think struggle with it.

Overall this news package does it’s job. It tell you the story about a UPS delivery person throwing packages on porches and breaking them. But the visuals in the package get to a point where they are actually distracting. The second women they interview, the way they position her next to the mail box and keep cut in really close to her face is unsettling and they continuously cut to the same ECU of a mail box like 5 times with in the package. You can just sort of tell that they didn’t have enough b-roll to cover the whole story.

My Mini-doc Pre-Production:

For my mini-doc I chose to do a short bio piece on one of the long time music teachers at Lakehouse Music Academy. Dan is a really funny guy and on top of teaching individual lessons and group bands. He also teachers music at a school in Asbury and continues to perform and create music in multiple of his own bands. He calls himself living proof that you can do what you love and actually make a good living for yourself.

In the pre-production packet I outlined what sort of visuals I need to collect to create an interesting and compelling piece. I also list some of the question that I’m going to ask Dan, but realized that I’m going to see where our conversation takes us and after I get his full interview and cut what I want out of it. I’ll see who much narration is actually needed to complete the piece and then once I’m editing I’ll take the b-roll that I’ll be filming and the pictures that Dan has given me and I’ll make sure to make them up with whatever he or I are talking about.

Nightmares From Set: Vol. 5 Apocalypse Now

Imagine actual hell, now think this set was most likely worse than that. Apocalypse Now, directed by Francis Ford Coppola and released in 1979 goes down as one of the best war films of its time, but for the director, actors and the crew it was an almost 68 week long nightmare that pushed everyone physically, mentally and emotionally.

Compared to the other projects I’ve covered in past weeks, this takes the cake. The movies horrible production period goes down in history as legend. When people say the title of this movie the first thing that pops into peoples’ mind isn’t the actual film, but the hell that it was to make the film.

Drugs, Alcohol and Acting Fueds:

Most people know that Hollywood isn’t known for being made of saints and that drug fueled performances is nothing new, but on a set like this were the heat makes you delusional and your sitting around for hours waiting for the director to bring a completed scene to the table, alcohol, LSD and cocaine became the only way that some of the actors could actually complete their scenes. In an article by Death by Films, the author describes it as “With Coppola making the script up as he went along, there was a lot of free time on the set of Apocalypse Now. Crew members described the crazy shoot as the result of too much money, too much time, too much drink and too much drugs. Little by little they all went insane. Actor Sam Bottoms, who played the surfer Lance Johnson, spent the whole shoot high on speed, LSD and marijuana” (Deathbyfilms).

Not only was it actor Sam Bottoms, but leading man Dennis Hopper and Marlan Brando were also using substances heavily. “Amidst all the chaos, stood Dennis Hopper. The hippy hellraiser of Hollywood. A man who lived on a daily diet of a half gallon of rum, 28 beers and three ounces of cocaine. When Coppola asked him how he could help him with his role, Hopper replied “an ounce of cocaine”. The production team ended up supplying him throughout the filming.” and for Brando, “He turned up drunk, weighing as much as an African elephant and having never looked at the script or read the book it was based on” (deathbyfilm).

Because Brando was so over weight they ended up having to shoot him completely in shadow in order to hid his body and because he never actually read the script he basically just said whatever and did whatever he wanted on camera.

But the worst part for director Coppola was that after a misunderstanding when Brando and Hopper first met, Brando refused to film any scenes with Hopper. So in order to actually complete the movie Hopper came in first and recorded all of his lines and then Brando listened to his recordings to film his part. “Brando said, ‘I’ll work with him, but you come in and do your scenes first and then I’ll come in and listen to you, but we’ll never be on the set together” (Parker).

Typhoons and Disease:

After missing actors for weeks and already being 6 weeks behind schedule a massive Typhoon hit the Phillepeans and halted production again because it had wiped most of the sets out. ” the typhoon that tore through the production destroying all the sets. More down time, which the crew put to good use. Parties at the hotel grew more infamous by the day. Swimming pools surrounded by bottles of beer and actors hurling themselves off the roof” (deathbyfilm).

Once production started up again the heat and bugs were so unbearable that crew members and the equipment weren’t functioning properly and many of the crew members feel ill. In a featurette all about the behind the scenes nightmare of Apocalypse Now they talk about the worst of the illnesses which go to Martin Sheen and Francis Ford Coppola. Sheen had spiraled out of control so badly with drugs and alcohol and the toll of tropical heat exhaustion caused him to have a massive heart attack and then crawl for a half a mile to get help, and when Coppola found out about the Sheen’s near death accident. He suffered an epileptic seizure as well as already loosing over 100 pounds and threatening to take his own life on 3 separate occasions due to filming. Of course all of this was kept from studio executives in hopes that they wouldn’t shut the production down.

The Location of the Shoot was an Actual Hell-scape:

Even if drugs and disease are your worse problems on set, it’s manageable, but Apocalypse now was filmed in the Philippines on an active war ground as the Philippines was in the middle of a Civil War. So the helicopters and other military equipment they were using would have to be taken at times to go off and blow things up for real.

Coppola got in trouble for filming the ritualistic killing of water buffalos and then keeping it in the movie. The dead bodies that were shown in many of the scenes were real corpses and after a few weeks of filming no one could handle the awful smell of rotting bodies. At night tigers would roam around the set and the behind the scenes youtube video explained that the film had to hire security guards after one whole weeks worth of on set allowance was stollen.

What was supposed to be a 60 day shoot dragged on for a whopping 238 days and came in millions of dollars over budget. But the film was a gritty and downright fantastic showing of war time nightmares, but when Coppola said that, “this film isn’t about Vietnam, it is Vietnam” it’s easy to see why.

Module 5: Continuity – How-To Video

Readings:

In the readings this week, I read chapters 3 and 4 out of Tom Schroepelle’s “Bare Bones Camera Course for Film and Video”. In chapter 3 he talks about creating sequences and how in order to create a compelling sequence you need to use different shot types. This includes wide, medium, close up and extreme close up. But when using these variety of shots you can’t just change how far or close you are to the same subject you need to varying the angle and the framing on the subject. Schroeppel says that a good rule of thumb is to change the angle in each camera shot at least 45 degrees and of course while doing that you also can not cross the 180 degree axis line in your scene.

Another way to have smooth transitioning between shots and make sure the editing isn’t too jarring to your viewers is to do something called a match on action. Where the movement started by an object or a person matches up with the action in the next shot perfectly. A simple example of this is if a character goes to grab a cup in a wide shot the cut to the close up of the cup should have their hand coming in and picking up the cup at the exact same place that you cut away from in the wide. Schroeppel said, ““If a movement begins in one shot and ends in the next, your viewer’s eyes will follow the action right across the cut, without paying much attention to anything else”.

In chapter 4, the book talks goes into detail and the importance of paying attention to screen direction. Schroeppel explains that screen direction is the direction that people and things face when viewed through a camera. When creating and cutting a scene there is an imaginary line the cuts through the scene. This is called the 180 degree line. It’s used to establish where people and things are in the scene and it gives the audience their bearings when viewing something. If you cross the line with your camera and start shooting from the other side all of a sudden you confuse people. “you reverse the screen direction of everything you see through the camera, even though nothing has moved but the camera.” (Schroeppel).

As long as you don’t cross the line with your camera shots then you are free as a director to move objects and people through out your scene with smooth continuity cuts and the audience will understand. Of course you can cross the 180 degree line in your scene but if you’re going from one side to the other you need a neutral shot in between to help transition the audience. For example if your shooting a conversation between two characters at a table using OTS shots then you would be over character one’s right shoulder with character 2 on the left side of the screen and then when you reversed you would be over character two’s left shoulder and character one would still be on the right side of the screen, but if all of a sudden you wanted to change what side you were shooting them on you would have to cut to a two shot with both characters straight on at the camera so the audience knew where they were in regards to the rest of the room.

Continuity Inspiration:

The small scenes used as examples in this video show not only great continuity editing, like match on action or matching eye lines but also pacing, motivation for cuts. It’s a great video for giving all sorts of examples on editing with purpose and not just for fancy reasons.

Bohemian Rhapsody is a fantastic movie but the editing in both this scene and a majority of the movie is suspect. In the scene where they are first meeting their new manager. The cuts move at such a fast and unmotivated pace that the audience can’t get their bearings and the continuity half the time doesn’t match with their eye-lines where there hands were and when the action finishes. For example when the manger first grabs the chair in one shot it makes a specific noise and movement, but then they cut away to another member of Queen and then cut back to him and the same movement and sound occurs again as if he was stuck in time during that cut.

The Hangover Part 3 uses a lot of continuity editing when cutting together their scenes but I think one of the best uses of it is in the opening scene when Zac Galafanakis’s character is talking to the kid in the moving car with the giraffe in the back of his car and both Zac and the kid keeping looking at each other and the giraffe and their eye-lines meet up perfectly every time when they cut. This was even harder for both the actors acting and the editors to make sure everything matched up because the giraffe wasn’t actually there.

This is one of those scenes, that when my friends and I were watching for the first time we noticed something weird right at the end of this clip. If this is supposed to be a wide of Captain Jack stepping off the boat and then cuts to a close up of his foot on the dock and then walking away but what we saw was one foot coming off the boat and the complete other foot coming onto the dock. It seems like a pretty big continuity error to us and other Youtube sin casters have also noticed it.

My How-To Video:

For my How-to video I started by thinking of a simple idea that I knew would have good visual steps. That lead me to making breakfast since I could easily show all the different steps in the kitchen and I knew that each step would have great sound effects like pouring and scraping and ice clinking. 

While filming my sister in the kitchen, I continuously made her do each action over and over again each from a different focal distance and slightly different angle with out ever crossing the 180 degree line. I also had to make mental note each time of where she put something down on the counter and make sure she didn’t move it in between the change over from the wide to the close up and I made sure to constantly check what hand she did something with so that when I cut between them she didn’t magically change hands. 

Then after both pre-production and production were done I went into editing. When editing the different shots together I wanted to make sure I had smooth transitions with well lined up match on actions. This met going frame by frame making sure that in the wide of medium shot as her hand got close to the bowl or coffee cup I cut into the close up and started the shot exactly where her hand landed in the wide before it. I also tried to make sure she had clean entrances and exits in and out frame so that there were no jarring jump cuts. I think I managed that for all the steps and it something didn’t exit perfectly I tried to use an interstitial shot/ cut away so that I could move her freely in the nest shot. 

Then to clean it all up I added some extra sound effects to some of the ones I had already naturally recorded while filming and added my own narration so that the video was easily understandable and the audience wasn’t just relying on the text steps. And finally rounded the whole video out with some back ground music to give it some nice ambience. 

Nightmares From Set: Vol. 4 The Haunting of Hill House

The Haunting of Hill House was a Netflix original TV series that dropped in 2018 and quickly after being released it became one of Netflix’s most popular series. The haunting tale of 6 children trying to live with the lasting effects of growing up in Hill House and loosing their mother at such a young age is extraordinarily entertaining but the true winner of the whole series is specifically episode 6 titled “Two Storms” which jumped between the adult versions of the siblings at a funeral for their youngest sister while a storm raged on outside and back to them as young children in Hill House also battling a huge storm. You would think that the episode would be just as scary an haunting as the other episodes but this one stands out specifically because it was filmed to look like a one take.

The director, Mike Flanagan, later goes on to uncover the fact that the whole episode was actually 5 long takes strung together. Similarly to last weeks Nightmare from Set installment about the long takes of 1917, this TV series had to create a specially built set and work with their camera and art department to make everything run smoothly. The biggest differences through are that in this case the actors change through out the story but with no cutting and because the plot takes place at night inside you can’t rely on natural lighting. So they had to not only choreograph the actors and cameras but also the light and reflection boards.

Specific Set and Lighting Design:

In YouTube features posted by both Netflix and Insider, the director, Flanagan describes when they first starting building the set they had episode 6 in mind. Since the modern funeral home set needed to be connected to the main Hill House set. This is because multiple times through out the episode the Mr. Crain, the father, walks through the funeral home into Hill house as if he walking back in time into his memories. “The sets also had to include hiding places for the crew, equipment and special lighting rigs, along with secret passage ways for the actors and their photo doubles to sprint through as the scenes slip from past to present” (Insider).

As they rehearsed they also used sound and dialogue cues to tell the steady cam operator when to pivot or an actor when they need to hit a specific mark so that the people controlling the beauty lighting can make sure it hits them just right. “The production was shut down for a month so that they could focus on rehearsing the episode with second team stand-ins. They’d walk through the entire script over and over and over again so that the crew could learn all the blocking, lighting, and camera choreography” (Insider).

The biggest challenge was that the scenes had to be carried out perfectly. There could be no leeway for error because then the scene’s dialogue wouldn’t make sense, the actors wouldn’t be lit properly or someone could get seriously hurt, by a set piece flying in or out or a bounce card being swung over head to get to the next acting mark. There was even a make shift steady cam elevator that brought the camera from the first floor to the second as the actors ran down the massive stairwell.

In the beginning part of the episode the father is circling the room and watching his fully adult children revert back to their younger selves and then become fully grown again but the camera never stops. In an article for Den of Geek, Flanagan the director reveals who it was done. “This first segment involved hiding the younger actors playing the Crain children around the corner in the viewing room, so they could run in and replace their adult counterparts during a 360-degree move around Tim Hutton. The adults sprinted back into place a moment later.”

Real Rain Effects = Real Flooding:

Since both parallel plot lines are tied together by a massive storm that knocks the power out the crew brought in huge rain and lighting rigs to actually create real rain and the lighting effect. Through out the whole rain comes pouring through the fireplace and the windows get hammered with rain seeping and then at the most climatic part of the episode a hall of windows chatter and the rain and wind comes blasting in. The windows shattering was the only thing made with CGI everything else was practical. “They installed massive rain effects which actually flooded the set a few times during rehearsal” (Insider). Director fo Photography, Michael Fimognari, went on to explain, “We thought it was important that you could feel the water effects.” (Netflix).

Child Actors:

Often times you hear about the nightmare of trying to rangle young children on set and get them to act just as fantastically as their adult counter parts. Take this show which had extremely young actors handling very heavy material and now make them learn both their lines and everyone else’s lines in the script as well as memorize all this complicated blocking and then perform it like a live stage production that just keeps going instead of filming it in small takes like usual.

The children tackled the episode so well that TV Guide highlighted them as their actors of the week when the show was first released.

Courtesy of Netflix

“Though each of the child actors has a standout moment in the season… we’d like to single out the younger set’s work in Episode 6. The hour is composed of several continuous shots, a format challenging to an actor of any age. And the script requires the kids to go from wariness about the sudden storm to an explosion of outright horror after having several ghostly encounters in the night, in the dark. Grace and Wilson gave off a quietly disturbed vibe as Theo and Shirley tried to process what they’d seen. Singleton made Steven a reassuring presence for his siblings. McGraw’s breathless panic when Nell was recovered was terrifying. And Hilliard’s earnest worry for Luke’s twin sister was note-perfect. In short: We care so much about the Crain children as adults because the actors playing their younger counterparts did their job — and were scary-good at it” (TV Guide).

The complexity and the nightmares of this episode caused a lot of head aches for the director, the camera operators and both the young and old cast, but the result is an entrancing episode that you can’t take your eye off of and it’s definitely the stand out episode of the season.

Visual Composition II: Montage Production & Post

Readings:

While planning for this project last week I discussed certain chapters from the The Bare Bones Camera Course for Film and Video. The textbook described different camera angles the use of a montage in film and all the different composition techniques used to make interesting and aesthetically pleasing visuals.

This week I continued to read from the textbook and in Chapter 10 which is all about after filming… editing. The author Tom Schroppel discusses the main points that if you weren’t the director or the one filming it, you should read the script all the way through and make sure you understand how the audience should understand the story. Then watch everything all the way through so you know what you’re working with. Then as you go through the clips you need to keep a detailed log of everything you see. The more detailed the log the easier, faster and better the editing will be.

He also talks about a paper edit which isn’t always necessarily done by every editor, but after creating a log of all the good footage taken, the editor will cut up and arrange the log into a “paper edit” of the film/ project.

Another important tip to editing is making sure you vary your shots and think about the pacing of the story. If the story moves at a fast pace than the cutting should be quick. If it’s a slow or sad scene then slow the cuts down and hold the shots for longer. And when it comes to varying your shots, your audience has the attention span of about 8 to 10 seconds of the same thing then it’s going to check out unless you give it something different. So when cutting together a scene. Going from a wide to another similar wide is boring but going from a wide to a close up of something in the wide keeps the audiences attention and makes them want to watch more.

The final thing Schroppel talks about in chapter 10 is the importance of sound in editing and how it can be used to bridge two different scenes together. The use of sound bridge can be very effective. For example if your on a military base and two men are talking to each other about their upcoming mission about to leave and then you slowly here a helicopter flying getting louder then you cut to them in the helicopter flying to that mission with the same sound at full volume now in the background. The author also talks about the 2 main things to remember when mixing your audio and video. One, to improve the quality ad effectiveness of your original sound recordings, and two, to mix all your sound elements together in such a way at they help get your message across.

Montage Editing Inspiration:

Baby Driver hands down is one of the best edited movies I’ve ever seen. It utilizes music to drive both the plot and the editing choices. In just he opening scene alone there are over a 100 shots which averages about a second or two for each shot. This quick and faced pace editing keeps the audience on their toes and makes you feel the pressure and constant movement that the characters are feeling in the fast paced heists. Edgar Wright is also very known for his use for quick cuts especially quick close up cuts. In this film in particular you see it whenever a person interacts with an inanimate object you get a quick close up cut of it and that takes you to a different thing.

Mad Max has some of the industries fastest cuts and it’s because of this this that most of the action filmed in the center of the screen so that the audiences eye doesn’t have to search all of the screen and get confused. Since often times the reason why there is pacing in movies is so the audience has time to understand everything that is on screen in front of them. This film chose to be different and made the cuts so fast to the point where if the action didn’t stay in a similar spot on screen audiences eye wouldn’t be able to keep up.

Stranger things is know for using very creative wipes and pans in order to cut between the eerie upside down and the real world. Instead of just fading in and out of black or cutting from a shot fo the upside to the real world the wipes between them make them feel like they are connected which is what the whole story is about. The upside down is lurking just below the surface and if you cut between the two worlds then it would feel like they are more separated by using creative cuts it ties everything together.

My Montage:

As I described in last weeks blog post, I made a montage about the National Park and beach, Sandy Hook in New Jersey. After planning my shots and writing my script I went to Sandy Hook and filmed my montage. As I was filming I did hit a couple bumps in the road. I couldn’t bring my tripod every where with me. There were certain parts of the part that didn’t warrant for me putting down a tripod and certain places where it wasn’t feasible dragging it with me. So making sure most of my shots were still steady even when holding the camera was very important. I also had to combat the sun, making sure I didn’t over expose my shots and loose the image info to the light was another thing I was constantly aware of.

But as the shooting continued I got more comfortable with it and was paying more attention to vary my shots and use different composition rules. I changed my depth of field for certain shots, framed things using the thirds. And got some high angle shots as well as low angle shots.

Then when it came to editing, I new my narration was going to be slow and calming so I wanted my editing to be the same a slow and relaxing edit to show the tranquility and beauty of the park. I also went in and stabilized and color graded the shots to counter the bright sunlight that washed a lot of the images out and re-added back it’s vibrant colors.

Then when it came to sound editing, because their was a decent amount of wind I could only keep some of the nat sound I captured with the camera. The rest i added. This included ambient waves crashing and seagulls cawing. In the beginning I layered leaves rustling and wind blowing which faded into the waves. And then there were specific sound effects added to accent specific parts of the script, like kids laughing when talking about the fun on the beach, or the sound of gun fire and men yelling when talking about the fort being in service and then a boat’s fog horn going off when talking about the lighthouse guiding boats to safety. All of these small things were adding to help further tell the story and I think the audio really sells Sandy Hook’s variety and interest along with the visuals I captured.

Nightmares From Set: Vol. 3 – 1917

The film 1917, was released in theaters Christmas of 2019 and the movie is a feat in it of itself. The movie is a minute shy of 2 hours and for the entire film you feel like your watching one take in real time and that’s is because you sort of are. Director Sam Mendez, producer Pippa Harris and cinematographer Rodger Deakins combined brain power and immense talent created a film that had all one takes that ran any where from 6 minutes long to 15 minutes long takes that were stitched together with hidden cuts.

Of course creating a film like this, it goes with out saying that there were going to be more than your usual obstacles. The art department, location team and camera department had to work tirelessly along with the director and actors to create multiple different sets. This included taking an empty field and digging full WWI style trenched that were the exact length of the time the scene took that was going to be shot with in them. In a behind the scenes featurette video the director Sam Mendes says “The challenges of prepping this movie re the same challenges of prepping any movies, times five. We had to measure every step of the journey… The scene has to be the exact length of the land and the land cannot be longer than the scene and the scene cannot be longer than the land. And so you have to rehearse every line of dialogue on location.” (Mendez)

A Fight Against Mother Nature:

In another article written by Vulture, the author Nate Jones, talks to producers and different department directors talk about each of their individual “hardest days on set”. For producer Harris, cinematographer Deakins, and location manager Emma Pill the weather and nature it self were there biggest threats. Because this film was shot as a oner the production team didn’t have any extra coverage to cut away too, if they couldn’t land a specific shot or if they wanted to cut something during post production because they didn’t like how it turned out. Everything in this movie had to happen otherwise you would loose the connection you had with the main characters long and argues trek.

So in order to keep continuity amongst all the long takes and because they couldn’t actually light any of the scenes since the camera would be moving on a 360 degree axis they shot the entire thing in complete cloud over and for anyone who knows anything about Great Britain it’s usually overcast there. Of course though, on day one of principal photography the sun came out to shine and wouldn’t go away. For Pippa Harris the lead producer on set, this was a nightmare. No producer and no studio wants to be behind schedule and over budget so at the end of the day when the studio called asking why they haven’t heard anything no one was happy. Harris recalled. “At about four or five in the afternoon, I got a slightly admonishing call from the studio, saying ‘You do realize you’re meant to email us when you first turn over?’ And I said, ‘Oh, well, we actually haven’t turned over yet.’ And that was of course not what the studio wants to hear on the first day of shooting.” (Harris). From this point on Harris explains this was the pacing of filming some days they would get way behind schedule and just rehearse since they couldn’t shoot and other days the rehearsing would pay off and they would get ahead again. And as a producer having to schedule for all exterior shots with no cover days was daunting. The whole production lasted for about 60 days at 5 different outdoor locations, which to Harris’s excitement met that they came in ahead of schedule and under budget.

Roger Deakins on the set of 1917. Photo: François Duhamel/Universal Pictures and DreamWorks Pictures

The sun was also a nightmare for Deakins as he had to be the one to call when the cloud coverage was enough to shoot and when it wasn’t and he never wanted to call it too early god forbid it went away too soon and then the entire production would have to go back to one. The issue with each take was that once it got started everything was in motion because usually no one was calling cut until the whole 8 to 10 minute scene was finished. “Deakins recalled. “I spent a lot of time watching the sky, and looking at weather apps on my phone, seeing when clouds might come in.” But even that was an imperfect method. “Sometimes you would think the radar would show a cloud system and some light rain coming towards you, but it would dissolve by the time it came to us. It was really frustrating.” (Jones)

On the complete other side of the spectrum, location coordinator, Emma Pill had to find replicas of WWI battle scenes with out actually being able to use the real sites because the were protected historical landmarks. So the main location that had the trenches dug into it was “Salisbury Plains” which is right next to Stonehenge. After digging and shooting in the trenches Emma had to ensure that the field would be put back to their previous state and she had to make sure that the protected wild life and protected archaeological items that lived on and where buried at the plains wasn’t disturbed. This met that Pill was working day and night with Ornithologists and had to get herself a proper license to exhume bodies. “Pill had the fields geo-scanned to ensure production did not disturb any remnants of Bronze Age culture. That included any three-thousand-year-old corpses that may have been lying around. “I had to get a license to exhume bodies,” she recalled. “Obviously if they were modern bodies, you’re calling the police. But ancient bodies, you have to have a license to have permission to exhume them from the ground.” (Heckman)

Thankfully they never did come across any bodies but they did run into troubles with the protected birds on set. After they built the entire worn down barn set and finished wrapping production on it they were set to strike it. But before tearing it down set designers found nests of the birds inside the barn and Ornithologists told them that they couldn’t tear it down and to wait for the birds to naturally just leave. “We couldn’t strike the barn because some swallows and wagtails had decided it was a perfect environment to nest,” Pill recalled. It is against the law to disturb a birds’ nest, and so there was nothing to do but bring in an ornithologist, and watch and wait until each loving couple eventually flew the coop — which they finally did, weeks later.” (Pill) It did put them behind schedule, but the team couldn’t blame the birds since it they were the ones who built the birds the perfect home in an already perfect environment.

This film had plenty of set back and plenty of obstacles, but for the entire production team it was a complete success. They were able to create an incredibly beautiful and technically advanced film that did great in theaters and even better during awards season. The use of the single take and the attention to detail that the camera department, set designers and stunt coordinators had created a story that was so enthralling and nail biting and at the same time completely hidden. For most of the film you can’t tell why you feel so immersed in the story, but then you realize it’s because you’re there with the character the whole time, and you never miss a beat or cut away. Just like the character you never have a chance to take a break and just breathe.

Visual Composition: Montage Pre-Production

Readings:

In the first article I read this week, author Jimm Fox, lists 11 pre-production steps for a successful project. If creators follow these steps and complete each one before starting to actually create anything then actually making and releasing the product/project becomes much easier and usually much more successful.

  1. Clearly Define Your Business Objective
  2. Define Your Audience
  3. Share Your Budget
  4. Develop Key Messages
  5. Develop a Creative Brief
  6. Find the Big Idea
  7. Treatment
  8. Storyboard
  9. Planned Distribution
  10. Length of Video
  11. Approvals

In another article written by Tubular Insights, author Mark Robertson talks about the importance of storyboarding and the best practices for visualizing a video. He talks about how storyboards are simple blueprint of your project so you have something to visualize before you actually start to make it. Robertson addresses the fact that it doesn’t need to be a work of art, but that once you have the different shots drawn out you should also include things like time of day, location and how you might verbally describe the shot to other people. Robertson also includes a video on how to make the most effective storyboards.

Another important thing to know other then different visual compositions and the importance pre- planning is different types of shots. In the article, Acting Tips: 12 Camera Shots Every Actor Should Know, author Helen Kantilaftis. The basic ones that she goes over are:

  1. Ariel Shot
  2. Establishing Shot (this is different from the master shot because this usually is used when introducing the exterior of a new location to the audience)
  3. Close Up (CU)
  4. Extreme Close Up (ECU)
  5. Medium Shot (MS)
  6. Dolly Zoom
  7. Over-the-shoulder (OTS)
  8. Low Angle Shot
  9. High Angle Shot
  10. Two Shot
  11. Wide/Long Shot (WS)
  12. Master Shot (yes this is different from the establishing shot, this shows you where key players in a scene will be sitting or standing and the layout of the room.)

In order to fully comprehend visual composition, montages and the importance of pre-production I also read a few chapters from the book, “The Bare Bones Camera Course for Film and Video” by Tom Schroeppel. In chapters 1 and 2 he talks about the basics of camera work like,

  • Exposure
  • Color Temperature
  • Light Meters
  • Lenses
  • Focus
  • Depth of Field

Schroeppel also discusses the importance of composition and creating a pleasing image for viewers using visual cues like leading room, the rule of thirds, balance, colors, and framing in your natural environment. He describes the camera as “a tool for looking at things in a special way.”

In chapters 5 and 6 he Schroeppel talks about camera moves and montages. The camera moves that he describes are very similar to the article above by Kantilaftis. And he describes montages as “a series of related shots used to condense time or distance, set a mood, or summarize information.” Montages are used in more than half of the most popular TV shows and films. They can show a relationship between two characters or objects but cutting back and forth between to simultaneous plots. They can show the passage of time by cutting to the same action happening over and over again over a long period of time. They can also be used to showcase a certain place, person or object using an array of different types of shots edited together to create a visual story.

Examples of Visual Compositions:

I liked this video because instead of showing you the importance of lead room and how to achieve it. The video shows how to create the lead room and why it’s important but then goes on to show you how to morph and manipulate it to give different feelings to a scene. It takes a simple and basic type of visual composition and levels it up a step.

This video describes depth of field and the 3 main factors that affect it in the most plain and simple way while also showing interesting visual examples. I’ve been given the depth of field lesson many times and honestly I’m not sure why but I just like this guys simple lesson and always go back to it when I forget when of the factors and which way it should move to increase or decrease my depth.

I like how this video ties in the knowledge you already have of depth and leading room to discuss how to really using leading lines to their most effective ability. When you can find the sweet spot of a leading line with your main subject, so not too far over and not flat/ straight on looking at them then your utilizing the lines of everyday life to get a shot with great depth but still visible lines.

My Montage Pre-Production:

After reading the textbook and the different articles and looking at different interesting visual examples of different compositions I went out and tested my knowledge of the different basic visual composition with a photography scavenger hunt showing how the same type of photo can become much more interesting by utilizing these different techniques.

Once completing my scavenger hunt I felt I had mastered visual composition and began to dive into the pre-production of my montage. I chose one of my favorite places to visit back at home, which is Sandy Hook park and beach. My friends and I have been visiting and exploring here for years.

I did some research on the park and then wrote out a short but interesting and informative script that really captured all the fun things the park has to offer and then using my knowledge of different shot compositions I created a detailed shot list and after that drew out my entire storyboard. After I finished creating the pictures I went back and added all the different technical aspects like what direction the camera was going to move in and if there could by any kind of variation to the shot if I needed to change it in the moment once I got on location.

Check out my pre-production packet below and see what I have planned out for my montage coming soon.

Nightmares From Set Vol. 2: The Wizard of Oz

As a producer, as a director, and especially as an actor I wouldn’t have wanted to have been anywhere near this set. A little over 80 years ago, the timeless movie “The Wizard of Oz” was released. Many people believe it to be the first film released in technicolor, while that is false, 1939 was a huge year for movies all across the world when it came to new technology and “The Wizard of Oz” goes down as one of the most influential films of all time, but making it was no easy stroll down the yellow brick road.

Ill Made Costumes:

The first obstacle the production team faced was during rehearsals the original actor casted to play the tin man became widely ill from the makeup that was used to paint him. In an article written by Vanity Fair, the actor Buddy Ebsen, woke up in the middle of the night “screaming from violent cramping in his hands, arms, and legs. When he had difficulty breathing, his wife called an ambulance and rushed him to the hospital. He remained in an oxygen tent for two weeks, recovering from the pure aluminum he had ingested into his lungs”. (Miller) You would think from there the studio would halt production and wait for him to get better to continue, but at MGM back in the day was money so after scolding Ebsen about getting back to work and seeing that he couldn’t they hired a new actor, Jack Haley. The studio also did go back and replace the aluminum make up with something less hazardous but Haley still ended up with ugly eye infections from getting it his while filming.

The tin man wasn’t the only character whose costume was ill made and unbearable to wear for long periods of time. The Wicked Witch of the West’s face had been permanently tuned green for months, once she realized that the makeup and socked into her skin because she was wearing it for so long. Margaret Hamilton’s friend alerted her, about a month and a half before filming ended, that she looked “so odd.” When she looked in the mirror, the actor realized the friend was right: Her Wicked Witch of the West makeup had “sunk into my skin. It must have been months before my face was really normal again” (Miller).

As for the Cowardly Lion and the Scarecrow their costumes were made so thick and heavy that they felt as though they were suffocating. The scarecrows skin layer wasn’t porous so he couldn’t breathe through his skin and sweat. And the lion’s costume was made from actual lion hair and weighted a ton and because the actors sweat so much in it, it had to be industrially cleaned everyday of filming.

Now a days, technology has come so far in make up and costuming that the superheros we see in every Hollywood blockbuster have ventilation systems built into their heavy costumes so it’s like having a built in air conditioner. The all blue makeup that used to take hours upon hours to paint the the X-men character Mystique has been made so it only takes an hour or two and can be removed easily and prosthetics and face painting over all have such safety regulations that you would never hear of an actor being stained or hospitalized due to it.

Special Effects Gone Wrong:

Another aspect that made The Wizard of Oz such a captivating movie was its use of early special effects. The Wicked Witch of the West explodes and melts, it snows, there’s a whole tornado. When this movie first came out those things were rarely ever seen before and it was mind blowing for audiences to with in theaters, but how they achieved those things weren’t exactly rated highly for their safety.

In an article written by Mirror on the horrors of the Wizard of Oz set the author goes into detail about the excruciating experience of when actress Maggie Hamilton who play’d the Wicked Witch of the West, caught on fire. “Hamilton was supposed to descend while a fire rose up but it illuminated before she descended and she suffered burns on her face and hands. She spent six months recuperating at home and in hospital” (Knight). After recuperating and coming back to set MGM wanted her to do another fire stunt. Hamilton put her foot down and said no so her stunt double did it and was also severely burned after a pipe exploded. “Stunt player Betty Danko spent 11 days in the hospital and her legs were permanently scarred” (Knight). And because it was the 1930’s in Hollywood females were payed no where near the same amount as their male counter parts and she was reportedly only payed about $35 for all of her pain and suffering.

Another memorable scene is when Dorothy wakes up in a poppy field with snow falling on her and the rest for the crew that snow isn’t computer generated like it could be now instead it was crystallized asbestos. The lovely way Mirror puts it is, “That’s right, Judy and co were being doused in carcinogens”. (Knight)

Looking at how careless the production team was and how poorly treated the stun performers were it’s great to see that today stunt performers have union protecting them and have set rules and guidelines to keep them and everyone around them safe. Just a simple fire stunt like the one the wicked witch of the east was out through would have had layers of protective gear on and KY jelly keeping her cool and fire retardant. A Hollywood stunt professional actually takes you through the process on the Youtube channel, Corridor Crew, of the layers that go on stunt performers before they’re lit on fire.

The Mistreatment of Judy Garland:

Judy Garland was a treasure in this film, but she wasn’t treated like it. MGM producers and studio heads thought she was far too fat and pig like and that she wasn’t ever going to amount to anything. They referred to her as “a fat little piggy with pig tails”. She was also basically the least paid main character in the movie. “Of the film’s 10 main cast members, 16-year-old star Judy Garland got the second-lowest salary—making more than only her canine companion, Terry, who played Toto.” (Miller).

Later in life Garland herself and other actors from the film came forwards and talked about the horrible behavior of the actors who played the munchkins. In an interview with Jack Park, Garland referred to them as drunks who thought they could get away with anything. “Garland added that all the munchkins were housed in one hotel in Culver City. They spent every night getting “smashed” and had to be captured using butterfly nets” (Burke). Judy’s ex-husband and cast mates also said that at the age of 16 the munching would put their hands up her skirt and just make life miserable and uncomfortable for her on set.

Of course a few of the munchkins themselves have spoken up and said that was true at all. “Judy was telling it according to her pills and booze that day. She left behind a legacy of untruths about us…There were a couple of kids from Germany who liked to drink beer. They drank beer morning, noon and night, and got in a little trouble. They wanted to meet the girls, but they were the only ones” (Burke). Which makes this just another case of he said verses she said.

What makes this even more sad is that sexually assault and the unfair treatment of women in the entertainment industry isn’t new and unfortunately hasn’t gone away. It has gotten better the same way makeup and costumes have gotten lest toxic and stunt performances have gotten more safe, but the mistreatment of women is still a very large problem. Just two years ago the #metoo movement started after a rash of powerful Hollywood men were ousted for sexually assaulting women. And it movie horror stories like this one where you can see where the harsh and money pinching movie producer stereotype came from.

Overall, while the movie might have been a nightmare to make it goes down as one of the best yet, I can’t seem to not think that a few of the actors who had to live with long lasting damage from filming wouldn’t have really cared if the movie was a hit but would have preferred it to have just been safer.