Audio Design: Podcast Production & Post

Readings:

This weeks reading are all about the best to record sound and edit. In the textbook “The Bare Bones Camera Course for Film and Video” the author Tom Schroeppel talks about audios in many different aspect. He covers audio patterns like omnidirectional or directional pick up patterns. This addresses how a specific mic will or will not pick up the audio around it. An omnidirectional mic will pick up sound all around it “in all directions”, while s directional mic had two basic pick up patterns cardioid, which is like a heart shaped pickup pattern with the pointed end on the heart being the best place for noise sensitivity. And the second common pick up for a directional mic, for example a boom/shotgun mic is supercardioid, which has an extremely narrow sensitivity for sound. “the area of sensitivity is so narrow that, to pick up the correct sound, you have to aim the microphone like a shotgun directly at the source” (Schroeppel 98).

In a different article “7 Secrets for Getting Pro-Sounding Vocals on Home Recordings” written by Filippo Gaetani. He talks about necessary things in order to get the best sounding narration/ recording. He mentions filming in a bedroom as the easiest place to get the least amount of sound echos off of walls since the mattresses pillow, blanket and even window curtains act as so9und barriers or dampeners that absorb your voices echo. He also talks about practicing and doing multiple takes in order to get the most natural and smooth sounding dialogue/ narration. As well as also making sure to test your audio level before you actually start to record your a -roll of audio. When recording you want to avoid the red zone on your level bar and avoid any peaking or clipping. So for example if you know your going to yell or scream or make a loud noise at any point in your recording then step back from the mic or lower the recording level so it doesn’t clip your track.

One of the final articles I read on sound editing this week “Sound Advice: Editing Audio for Video” by  Hal Robertson is all about how editing for sound is different then editing for video and when your editing audio for video you can’t just pay attention to the video first and think of audio later as an after thought they both hold equal importance and need to be thought of as separate things and then brought together at the end.

The first thing Robertson talked about was just like video has A-roll and B-roll so does audio. A-roll is your well recorded narration or speaking track that is necessary to the story. B-roll is any additional sound effect or music or audio snippet that doesn’t necessarily need to make the final export if it doesn’t fit. When editing audio you should also overlay the clips so that there is no jarring change in clip and you can toggle the fade in and fade out so there is always a seamless transition. Then in order to check your work listen with your eyes closed so that only your ears are assessing it. Things sound different when you’re reading and listening and watching and listening. So in order to get the most raw and objective listen to just your edited audio only use your ears.


Well mixed Audio & Video:

“A Quiet Place” the movie has countless scenes where the visuals and audio go hand in hand. The video above lists some of the scariest scenes due to the use of silence and then a jarring sound effect. The most stand out scene in the movie for me is when the family is walking back from getting supplies and its shots of beautiful scenery and this lovely family all together and then just the little boy in the back playing with a toy spaceship and then he what seams like the loudest thing in the world when the spaceship sound effects go off and as fast as the sound went off the monster swooped and killed the boy and then just like that it went back to silence and then seeing the look on the parents faces. It’s literally heart wrenching.

Dunkirk’s entire sound scape is the reason the movie actually makes you feel like your going to throw up from anxiety the entire time. Hans Zimmer’s score uses a specific type of simultaneous ascending and descending scales to make you constantly feel like something is building up, but then Nolan’s specific choice to have a stop watch running under the entire movie that speeds up and slows down when ever there is fighting verses just idol dialogue forces the audience heart rate to actually increase and decrease with it. Watching this film in theaters actually felt like a work out by the end because I was sitting on the edge of my seat with my heart pounding the entire time.

The audio design in the film “Gravity” was revolutionary, especially the first 13 minute continuous sequence that had audience trying to adjust to this new way of listening. Having most of the actors dialogue recorded through a helmet mic and then actually creating the sound vacuum of space and addressed sound as an afterward vibrations not as an actual sound frequency is wild. he part where Sandra Bullock is being whipped around on the broken space ship arm is wild and the sound felling like it’s spinning in circles around you and then the sound track being made for surround sound sound so that different parts clash and comes from different places in a room really made this film.

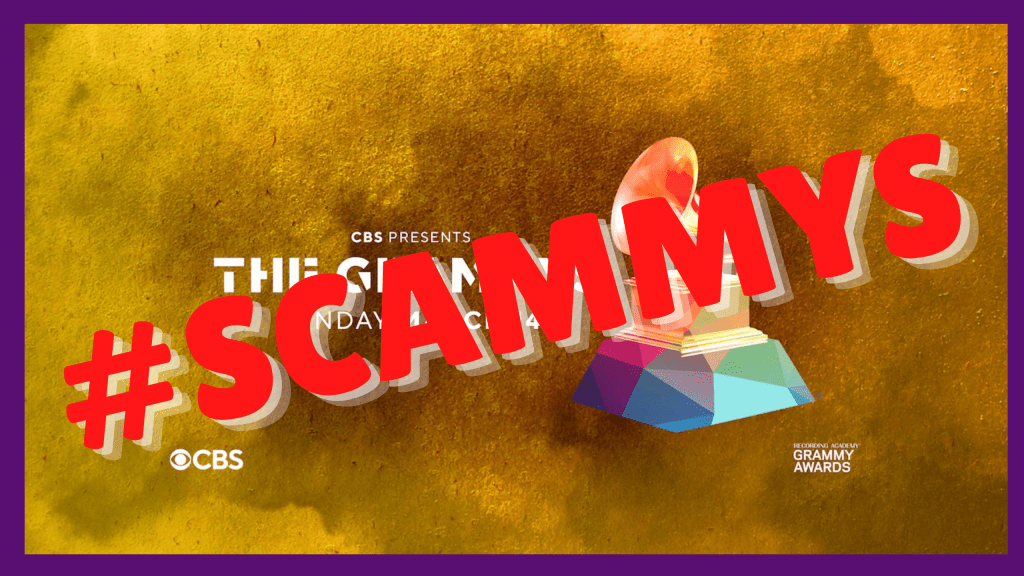
My Podcast (Grammys More Like #Scammys):

As I addressed in my previous blog post about this project, I made a podcast all about the corrupt and racist-ness of the Grammy awards and how the 2021 award show had some major upsets and scandals.

Using the methods that I learned from my reading this week, my co-host and I used my bed room since it is the quietest place in my house and recorded our A-roll. We had to do many takes due to messing up or just disliking how our voices sounded or how we were inflecting on a certain part of the sentence. When recording I used Adobe Audition to record and monitor the vocals and we used one Fifine condenser mic with a cardioid pick up pattern. Since I only had one mic and there was two of us recording my co0hosts voice doesn’t sound a bit different then mine and she also speaks much softer then me so there was a little more editing to do on her voice.

My mixdown for this podcast.

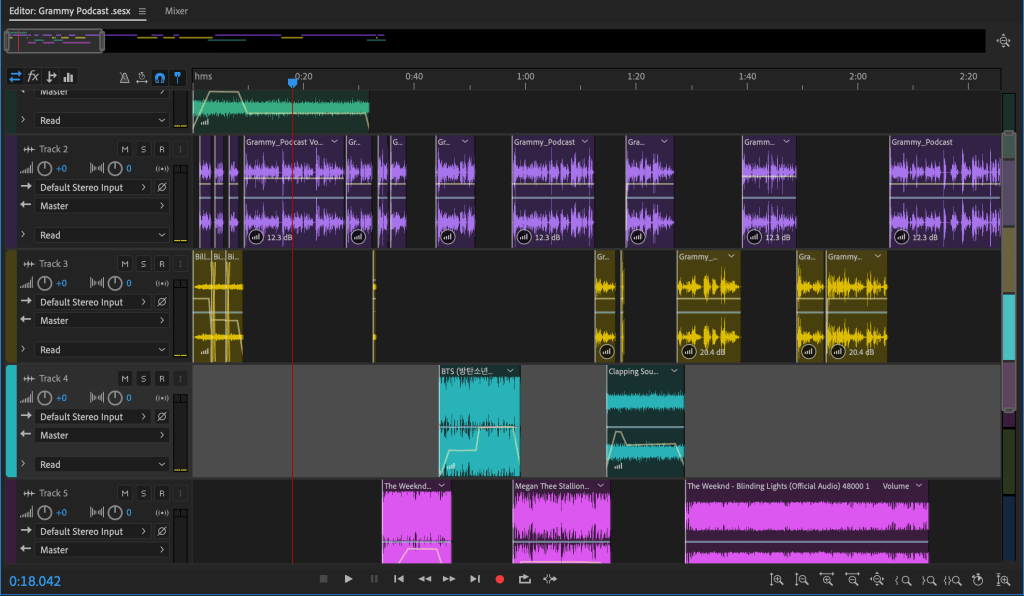
Once I had the A-roll recoding I went and collected my B-roll of the different speeches i was going to using sound bites from and the small parts of the songs I was going to be sampling. Then I added all of it to my mixdown in Audition and began to edit it together. The original mix was over 10 minutes so I had to get out of little of the dialogue and trim the B-roll a bit to make it fit the 10 minute mark. After that I listened back numerous times (with my eyes closed) in order to make sure all the transitions are clean.

Overall the podcast was a tone of fun to make, my co-host and I had a lot of laughs recording our narration and it was fun adding the different music and sound effects. One thing I wanted to mention was that one of my classmates had left me feed back the previous week about adding a sound bite of Jungkook of BTS’s livestream and while the idea was t I had k about how the ear reacts different than the eye. If this podcast video accompanying it then I probably would have added it since your would have seen h talking to the camera and seen the number of viewers but since this is only audio and his livestream he only speaks Korean I thought it would be very jarring and confusing to listeners so I did not add it.

Give my podcast a listen to here:

Nightmares From Set Vol.1: JAWS

If it could have gone wrong on this set… it did.

Anyone who has ever made or attempted to make a film knows it isn’t easy. You have to have an interesting, well manicured script, a full cast and crew, raise and budget your money, create or find multiple sets, design wardrobe hair and makeup and then once you’ve captured all the lines and scenes you have to edit it all together. And if that wasn’t hard enough you’re supposed to do all of it in a certain amount of time and before all that money you raised runs out.

Six out of ten times production companies/ studios are able to deliver on their promises of a great movie thats under budget, on time and a true blockbuster. Those other times, those movies take months more than planned, take thousands of extra dollars to make and half the time are a complete bust in theaters. When this occurs the producers on set are sent into a furry.

The job of production coordinators and line producers, specifically are to keep the obstacles and issues at an all time low and to help solve those problems when they arise. They’re also supposed to be making use the money is being spent wisely and that the production crew is adhering to the pre-planned schedule. It’s tough and tiring job and it rarely ever goes smoothly. But sometimes, even after everything goes wrong on set and your months behind your goal date and thousands if not millions of dollars in debt the movie still becomes a success. That’s the story behind the classic movie Jaws made in 1975 by, at the time, rookie director, Steven Spielberg.

The camera crew trying to work with the shark. (image courtesy of Den of Geek)

The movies harrowing past has been written about many times, including there being a full documentary made about it’s nightmarish set, but one well known blog “Den of Geek” sums up some of the biggest reasons the movie almost didn’t get made. It talks about the original budget of 3.5 million dollars quickly being thrown out the window and amounting to an ending total of about 9 million dollars, due to multiple boats flooding and needing to be remade for filming. This already started setting production back and then of course the famous shark that when first put in the water sunk right to the bottom of the ocean because no one accounted for the salt water eroding all the tubes and turbines. “Bruce worked reasonably well on dry land, but the seawater played havoc with his complex innards. His waterproof skin proved to be anything but, and the salt regularly corroded it. As David Brown, one of the producers, pointed out, Bruce also had the habit of sinking to the bottom of the sea” (Lambie).

Of course like any good director and producer they finally called it quits on wasting more time and money on an ugly and corny gimmick and instead reverted back to real film tactics to make you assume the shark was lurking with out actually seeing it. “The shark’s failure forced him to resort to other means to suggest its presence, using acting, cinematography and John Williams’ astonishing music to heighten the sense of fear. What could have been just another B-movie instead became a terrifying exercise in suspense” (Lambie).

Another film site, Mental Floss wrote an entire article about just the shark and how its malfunctions and delays actually changed the way films were thought about and released. Back in the 1970’s, the Christmas season was the time to put out popular films and massive Hollywood blockbusters were usually released in Los Angeles and New York first and then to all the other smaller cities, but because of the delays the movie wasn’t going to make it for Christmas of 1974 and instead Universal pushed it for Summer of 1975. They used the theme of the movie to their advantage and spent over $70,000 on a massive marketing campaign and decided to release the movie all over the country all at once. “Traditionally, high-profile movies opened in New York City or Los Angeles before slowly spreading to other cities and then trickling into small towns months later. Wide releases were generally reserved for duds; studios would cast a wide net to maximize ticket sales before negative word of mouth killed a film. But after the ad campaign made Jaws the summer’s can’t-miss flick, Universal went all-in on the release, and the movie opened in an unprecedented 465 theaters on June 20, 1975.” (Demain).

Original movie poster. (Image courtesy of Amazon.com)

But even before production started and the shark became a nightmare of its own, things were going terribly wrong for the producing team in pre-planning The films script wasn’t finished before filming started because it traveled between 3 different writers hands and had countless re-writes to make the lines funnier and the characters more likable then the original book at written them. Then casting was dreadful. They couldn’t seem to land any big name Hollywood actors for months. People kept turning them down or just didn’t fit Spielberg’s image of what they character should be like.

“Spielberg recalled the stress of casting the movie’s three main parts. “It took six months to cast Quint,” Spielberg revealed, admitting he had been turned down by Lee Marvin and Sterling Hayden before producer David Brown suggested the actor who finally got the part, Robert Shaw, with whom Brown had worked on The Sting” (Scott).

Overall the movie’s process still goes down as one of the hardest and most dismal moments in Spielberg’s and producers, Brown and Zanuck’s careers, but by being persistent, level headed and having strong film techniques to fall back and relay on the team created the #1 selling movie of 1975 and the highest grossing film of all time, (that is until Spielberg’s friend George Lucas came along two years later and released a small film called “Star Wars”). This film is the perfect example of why planning ahead of things is so impart and even after you plan and every thing goes to hell, you need to continue to just keep your head down and continue to work until someone physically stops you from doing so. The film was roughly 5.5 million dollars over budget and took triple the amount of time to film, but in the end they made a hit.

Audio Design: Podcast Pre-Production

Readings:

After reading a few different sources on good practices of sound different ways to plan and execute a good podcast I learned a lot of different tips and tricks on how to make my upcoming podcast the best it can be.

On the podcast series “Podcraft: Honing the Art of Podcasting” made by thepodcasthost.com they have multiple episodes that dive deep into different important aspects on how to make an interesting and seamless podcast.

In one of their episodes they talk about the importance of scripting or not scripting. Their take is that in most cases yes there should be a framework of a script so that your intro and outro and any sponsored ads are polished and sound uniformed and practiced. But for many other podcasts in order to make it sound natural and conversational you want to just list out bullet points with important facts and details that you don’t want to miss.

This point leads into another one of their episodes where they talk about the podcast script having a seamless and noticeable narrative that helps the podcast flow and makes it easy to follow along. “Your listeners benefit because having an engaging podcast that has a proper flow to it will hold your listeners attention. they’re more likely to stick with it until the end because like all great tales they want to know how it ends.” (Cudmore, Podcraft S6 Ep.2) One of the biggest obstacles in a podcast is that if their is no pre-made transcript then your audience is just listening with no words to look at so you have to make simple and easy for the ear not the eye.

One of my favorite of their episodes talked about something that I too think is one of the most important parts of creating an entertaining podcast and that is making sure there is personality in the hosts/narrators voices. “Let your personality shine through. That’s what people will remember. That’s what will draw people in. And that’s precisely what will mark you down as a superior podcast host.” (Cudmore, Podcraft S6 Ep.3) When telling whatever story you’re trying to tell on your podcast cracking jokes, adding your own insight inflecting on certain words or phrases in your own way makes all the difference in podcast. If your listening to something heart breaking then the person narrating better have all the sincerity in the world in their voice, but if it something upbeat and funny then making a joke a laughing or raising your voice to emphasis the punchline of s story is just as important as writing the punchline out in the first place.

Great Podcast Examples:

In the podcast “Song Exploder” which is a break down of some of music’s biggest artists breaking down their biggest hits, I love the way this podcast incorporates the demo tracks of the song the artist talking about as they’re talking about how it was built is so interesting. I also like the way the podcast doesn’t just interview the artist but has them take us through their process almost like they are telling one long story about their song.

In this podcast “The Big Picture” all about blockbuster film and the film industry, the opening grabs you with dramatic music like you were in real action movie, clear and crisp audio that makes you feel like they’re speaking directly into your ears. They also intertwine sound bites from the topics they’re talking about perfectly with the narration. Also having the two separate hosts you would think would be a challenge at times to decide who would talk about what, but they bounce off each other perfectly and they never miss a beat on who is supposed to jump in when.

This podcast “You Must Remeber This” is supposed to make you feel like you’re going back in time remembering the golden days of film and entertainment. It starts with morse code and an old time phonograph sound and then echoing voices as if you’re going back in time and then an old sounding song singing the title of the podcast. It perfectly sets the mood even before the actual narration starts.

My Podcast Pre-Production:

When first thinking about my podcast I wanted to do something that I knew a decent amount about and that was relevant and current in todays society. I love entertainment and pop culture of any kind. So the big upsets and scandals that occurred at the Grammy’s just felt right.

I felt that this topic having to do with an award show for music would be the perfect opportunity to incorporate strong sound effects and sound bites of relevant songs and the celebrities talking. I can also use applause and cheering like you would hear at an award show to create a strong environment/ambiance.

When planning and writing out the podcast I used the tips given by Podcraft Podcast. I scripted a portion of the podcast and added exactly where I want to edit in certain sound effects but I also left large portions with just bullet points so that mine and my co-hosts voice/personality can shine through. It’s also a liner narrative in my opinion. I starts with the biggest upset of the show that leads to the next biggest upset and we round out the show with final scandal and then close. It’s a simple plot jam packed with facts, opinions, quotes, sound bites and songs and it’s all met to get you thinking about what at the #Scammys makes you mad/upset with the western society treats people of color.

Info & Data Graphics: Brochure Design

Last week I designed both a webpage and mobile page for a travel agency, this week I took that branding and made it into an atypical and informative brochure. In order to stay with last week’s work I kept all the typography the same and or similar and all the text box and background colors are in the family of blues. The blue is supposed to remind audiences of the abundance of beautiful beaches California has to offer. The front of the brochure has minimal text on it. It’s met to draw people in with the very distinctive Hollywood Sign text and all the bright and vibrant pictures. Then once you open in up you’ll see all the different places and activities the company offers in California.

One of the biggest challenges while designing this was making sure it didn’t look a typical brochure where everything is stuck on each singular rectangle and everything fits into a perfect box design. So when I created this layout I wanted to the front panel, the Amusement park panel and the Hollywood Panel could function on their own since many people read brochures one panel at a time and don’t unfold it completely in the beginning. But the other two panels on the inside of the brochure work in tandem because at that point the brochure would be fully unfolded.

A few techniques that I utilized from the 99 designs article “11 techniques for breaking the typographic grid” while designing was overlapping images and text boxes, utilizing the edges of the page by having some of my hand drawn icons get cut off on the page. I used wrapped text in many of the areas so that the text didn’t get lost in the mages that they overlapped.

Another example of a design technique was illustrating areas on the brochure. Like the Hollywood Sign panel. “Using illustrations in web and print design can balance out and overlap rigid grid layouts, giving compositions a playful look.” (Creger). I used the same technique when I was designing the webpages for this company in order to give both designs a fun and family friendly feel.

When first beginning to design the brochure instead of just drawing random things down a piece of paper. I went on to the site Canva and laid a few things out in different arbitrary ways to see what I liked and what I didn’t like then I took all the different assets and moved over to InDesign and designed a more complex version of it.

When formatting the text I already knew that I was going to be using the text “SF Hollywood Capital” for the titles because that’s what the main company name/logo is in, but on the website that I designed last week I used a regular sans serif and I ended up not liking it. So for the brochure in order to make sure everyone would be able to easily read it, even in the smaller parts I used the bold “Montserrat”.

Overall, I prefer this design to the original webpage designs I did. I like that the brochure had unconventional layout and that the background and accent shape colors compliment the vibrant colors of all the photos I had of California and the hand drawn icons that I used to overlap the pictures and text boxes really give it a sense of fun which is what the travel company is trying to sell to families when they book a trip to California.

Designing For the Web: Desktop & Mobile Design

Websites are one of those base platforms that every company needs. It gives you a home base for your clients to go to. They can see your product get a sense of your companies values and see that it’s not an online scam buying from you. But now a days you can’t just through all the info onto the page and make sure it’s spaced out enough for people to read on their computers. Now you have to have an appealing and easy to read layout for computer, mobile device, tablet and even watches.

For my website design, I created a webpage and mobile page for a travel agency based in California. Continuing with the importance of identifiable branding for the company, the color and text are bold and made specifically to evoke specific thought by the users. The whole website is designed using different shades of blue. Blue reminds many people of the beach/ocean, which is what California is probably most know for and the type is in the same fashion as the Hollywood sign which is one of the most recognizable symbols from the state.

This homepage was designed with the main idea of simplicity but also fun/variety. Following the steps that the “Web Style Guide” lays out in their section on page design. The company is clearly displayed at the top and the navigation bar is directly below, still towards the top of the page, and each tab is written in bold. Under that is a simple blurb about the state and a few pictures that stay with in the blue color scheme of the company. The fun graphics at the bottom of the page show the variety of fun landmarks California has to offer and pull people in and then once on the websites they can navigate to the other pages to get more info. The homepage is not supposed to be the heavy info, overwhelming part of the website.

The biggest part of the design from webpage to mobile was to make sure that the same amount info fit on to the page with out the user having to scroll down. Even after booking their trip through the website, they would still want to use the site to find certain maps and descriptions on different interesting places to visit while in California, so the customer would be more likely to use the mobile version of the site verses the desktop version.

Two differences that both versions of the websites don’t have are there’s no logo. This is because the company name itself is very distinct and acts as a logo in itself. The second thing is more specifically for the mobile version. In the article “5 Tips for Creating Great Mobile App User Interfaces” the author describes that the best place to put the navigation buttons at the bottom of the page because that’s where our thumbs are. :Usually, application UI elements are either placed at the bottom of the app (most common) or at the top” (Aarabi). In the case of this website they stayed in the same spot as the computer site in order to keep unity amongst both and not confuse the users. But also because this is a website and not an app, so naturally I would not look at the bottom of the screen on a website, but I would for an app.

Branding & Visual Identity: Ad Design

In the blog post before this one I had to make a logo for a fake brand or company of my design. So I created the fun candle company “Cozy Candles”. Its main selling demographic are women in their teens and adulthood, hence the pink color and simple unique typeface. In this part two of the assignment we had to create an advertisement of some sort to promote our brand.

The add created above is what “Graphic Designs Solutions” would call a “consumer ad” since it is directed towards the general public and not a specific business or market. This add is also specifically designed for social media platforms and technological consumption. Most people are buying things based off sponsored ads on their social platforms verses seeing them printed in a magazine or news paper or billboard.

The process started with the physical subject of the ad, which is the candle, and then going from there. I originally had many different types of photos to chose from that I had taken. In the end I think many of these photos could be used in different kinds if ads for the company, but the add that I was going for is one that has the logo and the product dominantly shown and then minimal text on the post since most of the info would be in the comment posted under the photo.

I ended up choosing the one where the candle was justified to the upper left because the logo is justified to the bottom right so the two things would frame the composition well. I also used the simplistic other text to further frame the ad and have the eye easily circle the photo reading all the text and end up landing on our beautiful main product, the candle.

The ad also adheres and depicts the company’s values and brand identity. It used the correct shades of pink. Keeps with simple but all capitalized letters and doesn’t overwhelm anyone when looking at it. It’s supposed to be simple and calming to like just like candles are calming to smell. Another big part of the add is the fact that since you’d be seeing it on social media you’ll already have the company social handle readily available, so the most important info is the website since it is an all online product. That’s also why the website is in a box to further draw attention to it and it’s closest to the logo.

While this is just one ad, it does tell a story and evoke very specific emotions with the other things in the photo adding to it. The fancy gems and pearls make you feel classy and give the candles a sense of luxury and the flowers in the background subconsciously make consumers think about all the wonderful scents the candles can come in. But if I were to continue this ad campaign. I may start using those other photos with multiple candles in it to show consumers that you can’t just have one of our candles – you need them all to be at your peak serenity.

Branding & Visual Identity: Logo Design

Creating a company with a good product or service is hard, but making sure that company has a good marketing strategy and brand identity is even harder. But it’s also extremely necessary. Pretty every company you’ve bought from or service you’ve used has been branded because it’s a way for consumers to differentiate between products. For this weeks assignment we were tasked with creating a logo to a fake product/company. At the time I felt stressed and really has no idea where I was going to even start this idea from so I lit my favorite candle in my room and then it hit me. I’ll make a fake candle company.

Here are the rough sketches and ideas I had for possible logo designs.

It started with trying to come up the name. Very often or not alliterations tend to stick in peoples’ minds more and I also wanted to the name to evoke a feeling. What more do you want out of the look and scent of your candle than to feel all cozy on your couch after you’ve lit it. Thus “Cozy Candle” was born. From there I went into the conceptualizing stage. In the book “Graphic Design Solutions” author Robin Landa talks about your brands visual identity and how it needs to easily identifiable, memorable, distinctive, sustainable and flexible.

With that in mind I created a simple but fun and easily identifiable logo. When designing you don’t want to have too many over whelming colors since it needs to be unilaterally seen by all types of people, which is why I stuck with simple white and black type. The pink candle in the middle is used as both letters, a symbol for what we sell and the color choice does show the sort of vibe and demographic that the company would be selling to.

When thinking about audience and sales demographic, I made it more for women in their teens and adults. Not to say men can’t buy candles it’s just not typically and this company is trying to brand itself best for the majority of people that would buy it products.

I also created a fully grayscale version of the logo since part of the brand identity is to make the brand/logo flexible and still readable. Since many things the logo might be printed in could be all black and white and because many people are color blind I had to see that the logo held up with out its distinctive pink color. In my opinion it does. The fun yet simple way that the “o” is a flame and the “l” is the candle stick, “sticks” with people even with out color.

Overall the logo is simple but fun. The type is very thin, but it has a light feeling to it which is good to be paired with candles since the scent of them is supposed to make you feel all light and comforted. The type face is also one of a kind since it was drawn by me and that’s a great way to brand one of a kind candles.

Movie Poster: Utilizing Composition Layout & Typography

In previous projects I’ve learned about the importance of composition and how depth and shadow can make all the difference. I’ve also learned about typography and how making sure that the text is readable and fits in with the rest of the design.

For this poster I happened to have taken a photo of my sister where she just happened to be looking back wards horrified at something so I decided to use that as my base and design a horror movie poster. From there I took a blurry photo of the snow covered woods behind my house, this is so I could add depth to the poster. After taking the photo since it was horizontal, I had to crop and duplicate the top and then blend the two pieces together using the stamp tool and smudge tool. I then took a photo of a random snow bank and comped that onto the photo in order to add a a foreground to the photo.

I then comped a photo of my sisters hand as a shadow with long finger nails on so that it looked more like a monster then just a normal humans hand.

In order to make it seem more like a shadow that she couldn’t see I put the hand low (behind the snow bank) and off to the left side which is opposite the side that her head is turned to.

When it came to the type face, I knew that the rest of the poster would be tinted blue so the font needed to stand out as stark white. I also knew that the bigger and bolder the font the better since the title is supposed to feel like warning. I then added the icicle accents to further do with the snow theme. When adding the icicles,  “Graphic Designs Solutions”, described adding things to letters as swashes, but I didn’t think these were the same since they weren’t added to any of the letters descenders or ascenders.

I also originally going to leave the poster after adding the type, but to further make the poster feel 3D I added Kelly over the top the font so show that even though she is in the middle ground of the poster she is still the main center of focus. So after your read the text see the shadow you follow the shadow up to see Kelly’s horrified face. I also added a shadow behind Kelly in order to show that the type was a part of the composition and that she was effecting in some way.

The final piece added to the poster to make sure the type face stood out from all the other white snow was a slight vignette. In the textbook, “The Graphic Design Solutions”, it talks about using value to further the space. “a progressive shift in tone or value, form dark to light or light to dark, can contribute to the illusion of spacial depth or motion” (Landa). In order to for this to work I only added the value change to the comped photos but not the texts. This made the tag line and in theaters line on the top and bottom feel like they were jumping off the page.

Visualization & Color

While studying different Milton Glaser color renditions, we were tasked with creating our own version. I chose to use the side profile of Harry Styles (one of my absolute favorite people on earth) and create a design that would be fun and remind people of one of his #1 songs, “Watermelon Sugar”. I also specifically chose a picture of Styles in 2015 when he had longer hair, so that I had more area to work with.

Here are a couple photos I used as inspiration for my Glaser design.

According to “The Ultimate UX Guide to Color Design” by Justin Baker, I chose to use both Analogues ad Complementary colors in order to make this design. Green and red being the complementary colors because they are opposite each other on the color wheel. Red and pink on the other hand are analogues colors because they are next to each other on the color wheel. I also chose to make each silhouette have a base color in each different color space. Red is one of the three primary colors, green is one of the three secondary and pink (magenta) is one of the six tertiary colors. For each individual silhouette I created different shades and tints of each base color. If I was actually painting this I would physically be adding different amounts of white and black to create darker and lighter tones of the base color, but by using a computer software each color is just a different hexadecimal. Which the guide explains as a color “specified with: #RRGGBB, where the RR (red), GG (green) and BB (blue) hexadecimal integers specify the components of the color.” (Baker). By using these colors I felt I had a good representation of all the different subsets of the color wheel and I knew they all went well together.

On the other side of my Glaser rendition is the emotional concept that went into its design. Each color give off its own emotion when it comes to how humans interpret them. This is why a lot of marketing and branding departments in companies use color to manipulate their consumers. We as humans also have preconceived notions about certain color combinations. For example, red and yellow make many people think about McDonalds and make them want those absolute delicious fires and that because the colors red and yellow actually induce hunger. When the colors orange, purple and black are together people usually think of Halloween and I feel that’s the same thing with red, pink and green. When you see those three colors together, especially with a nice light blue background you think of watermelon and fun summer days in the sun.

This is described by “Color Psychology in Marketing” written by Lindsay Kolowich Cox. The color red is known for bringing excitement and energy, pink is all about fun, femininity and creativity and green is very tied to nature and hope. All of that mixed together on a blue background which usually incites a very calming feeling is great mix of color to make the viewer easily view and enjoy the design.

Layout & Typographic Design

For this project I chose to visual represent the word “music”. Clearly when we think of music we think of the notes that are strung together to make the music and just like music notes, letters get strung together to create words.

After reading about the different parts of a letter and what to do and not to do when designing in the “Graphic Designs Solutions”, I began to create the word in Adobe Illustrator. Obviously I couldn’t just type the word out and pick a font and call it a day. Instead I did start with a base font. I picked something that already had extenuated ascenders and descenders so I had something to work with when I was creating the music notes. Using reference pictures I was able to music certain music symbols that resembled many of the letters in the word.

Technically in order to design each letter I added swashes to most of the ascenders, descenders and terminals.

Another part of type design that I had to take into consideration was when the author Robin Landa, described the importance of integrating or not integrating the type into the other images it accompanies. Some designers would argue that the text is met to serve a purpose and give information so keep it neutral/different. Others believe the type is just as much of an art form as the art it accompanies so why not tie them together. For this particular project I chose to tie them together.

I wanted it to feel like the letters were just bigger and different looking music notes coming out of the boombox. This met that I did have to mess with the vertical and horizontal spacing of the letters. I understand that often times stretching, squishing, or kerning a letter can make it difficult to read and that according to Ellen Lupton in “Thinking With Type” stretching your type can also be a considered a “type crime”. But in this case, humans perception of sound is that it grows in order to fill the space that it’s being released into. So in order ton make the word feel like it was coming out of the boombox I designed in Photoshop, the letters had to gradually get bigger and fill up more of the space.

The final thing that I considered while designing the type was typographic texture/typographic color. When looking at music notes some parts of the note are much darker and denser, and other parts, like the stems, are much thinner and lighter. So when picking the font and then designing over it I kept in mind which parts should be heavier and which parts shouldn’t. In this instance I am also aware again that this type of letter design would be harder to read if were shrunk and put with a bunch of other words, but then again I feel the over design of the word would have to be changed because the entire layout of the piece would be different.

Overall, out of the few project we’ve done so far in this course, this one has been the most fun and the one that I want to explore more. I think the creative choices you can make when designing typography are endless and extremely interesting.