
This Week’s Reading:
Chapter 10 – Show & Tell:
The final section of the book “Animated Storytelling” by Liz Blazer talks about the very important part of creating which is sharing what you created. This is a relaiivly short section but the points she makes in it are very important.
Once you’ve finished your animation, you need to package it up and make it nice and presentable. Some of her suggestions being, have a title screen, a long and a still image from the animation to go with it. You also want to have a nice and tight description of the project that ranges anywhere from 2 to 3 sentences. And her final suggestion is to create a director bio, that way people get to know you more as the creator and possibly learn of other projects you’ve completed and know the story of your film so you can answer any ones questions about it at a moments notice.
Blazer also talks about the importance of networking and not just online networking using social platforms, but in person networking as well. Going to conferences and festivals and talking to other people in the industry can lead to collaborations and huge opportunities that you wouldn’t receive anywhere else. Blazer knew she was an odd person but she used her quirkiness to her advantage and it helped her write the animated storytelling book.
Overall, you can follow every step in this book and create a wonderful animated film, but if you don’t do the work to polish the whole package and get yourself out there then no one will ever see it and it won’t matter. Personally, I found chapter 10, show and tell to be the most important one.
My Inspiration:
To me this this is sick. I love the way the light only reflects to certain places on the brick and the way the sign flickers in the beginning. This was definitely what I was trying to emulate with my project.
This particular animation also has a separate video that more of a how to when it comes to the puppet pin tool. And I used how they made her tail swing back and forth for when I was animating the plug into the wall.
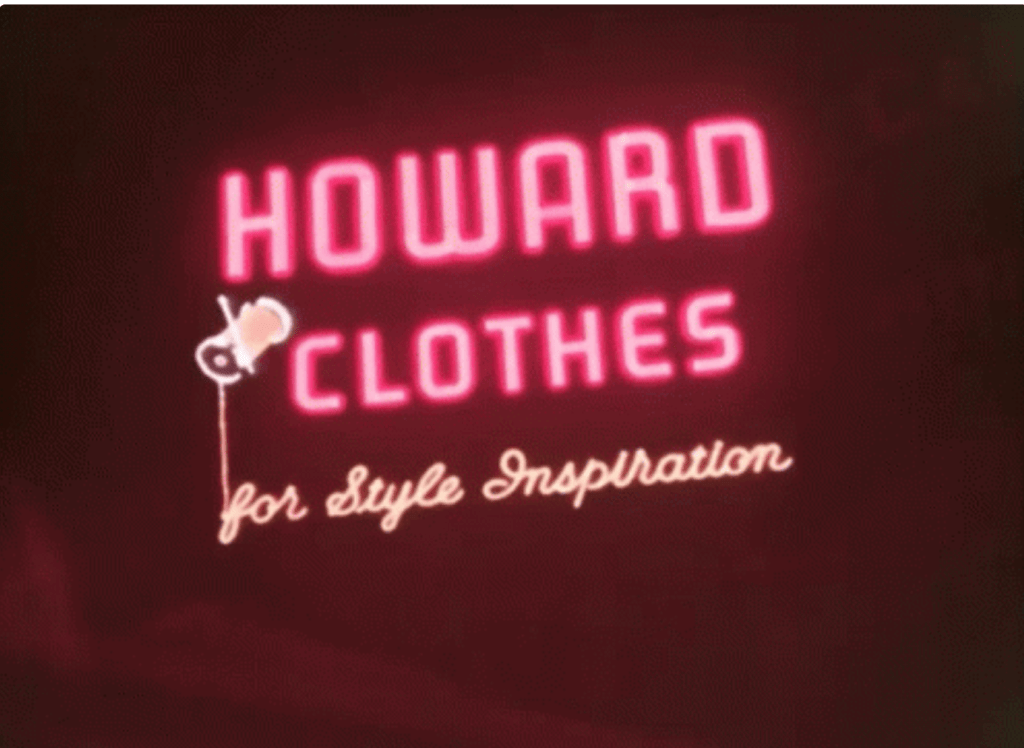
If you click the link under the photo you’ll see the actual animation that is done with the neon sign. I just thought it was cool that the sign did more than just light up and I brought that thinking into the project with me, when i came to adding light reflections and the flowers and everything else.
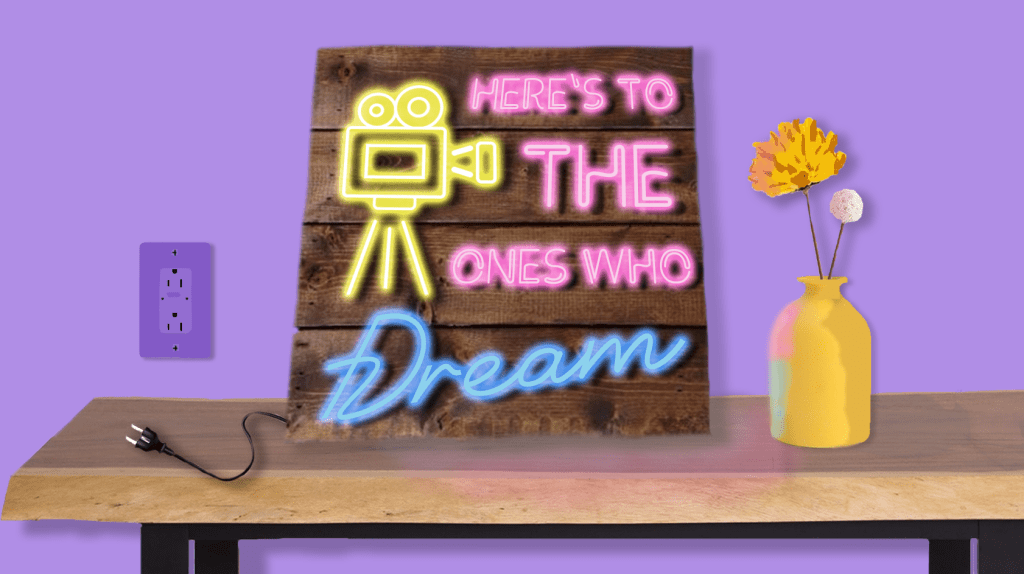
My Final Animated Sign Board:
So for my final project, I saw that one option was an animated sign and I thought this would be cool. I had seen them a few times on my social media and wanted to try and make it myself.
So I started in photoshop and built the entire graphic, using shapes and painting shadows on things and then using the text tool to project the sign. After that I brought it over to After Effects and first used the puppet pin tool to move the electrical cord into the wall. (I used a hidden shape layer to make it kind of look like the prongs go into the wall.) Then I used the flicker color effect on each text layers outer glow and messed with the opacity. I also made a double layer of both the table and the vase so that when the sign is off there is no reflection and when the sign turns on the reflections appear.
The overall project was a lot of fun and cool to see who much stuff I have learned to do over the course of the class. Most of this stuff was just trail and error and moving a bunch of keyframes around until i got it to look like what I wanted. Then once I had the animation down. i found some cool neon sign sound effects and found a copyright free instrumental version of the song that goes along with the quote on the sign and added it all together. It’s a cute little video that loop perfectly and I really enjoyed making it and over all really enjoyed this class and honestly looked forward to creating something new and interesting each week.
